The Ultimate FFmpeg Cheat Sheet for High-Retention YouTube Music Videos
Your manual video editing workflow is a liability.
Every minute you spend dragging MP3 files onto a timeline in Premiere Pro or Resolve is a minute you aren't scaling your portfolio.
The YouTube algorithm does not reward your "artistic struggle" or the hours you spent manually aligning a static image to an AI-generated track. It rewards frequency, consistency, and viewer retention.
If you cannot generate fifty high-quality music videos while you sleep, you aren't a producer. You are a bottleneck.
You are losing the volume game to creators who treat their channels like software, not craft projects. To win, you must stop "editing" and start deploying.
Insight📌 Key Takeaways:
- Zero-Latency Scaling: Eliminate manual rendering times by moving video production to the command line.
- Algorithmic Retention: Use dynamic overlays and programmatic filters to stop viewers from clicking away from static images.
- Cost Neutrality: Replace expensive NLE software subscriptions with free, server-side automation tools.
Why ffmpeg commands for youtube automation is more important than ever right now
The barrier to entry for high-fidelity audio has collapsed.
Tools like Suno AI and Udio have democratized professional-grade music production. Today, the "secret sauce" isn't just the song—it’s the visual delivery system.
Most creators are still stuck in the "Old World." They download a track, open a heavy GUI, wait for the interface to load, and manually export one video at a time. This is a dead-end strategy.
By the time you finish one video, a competitor using ffmpeg commands for youtube automation has already scheduled an entire month of content. They are capturing the search traffic, dominating the "Up Next" sidebar, and building authority while you are still staring at a progress bar.
FFmpeg is the engine of the modern YouTube music economy.
It is a command-line powerhouse that handles encoding, muxing, and filtering with near-zero overhead. It doesn't need a fancy interface; it needs specific instructions. When you master these commands, you transform from a manual laborer into a systems architect.
We are currently seeing a massive shift in how "Lofi Girl" style channels and "Type Beat" producers operate. The winners are those who can programmatically map audio waveforms to visual elements.
High retention on YouTube requires more than just a 10-minute loop of a static JPG. You need subtle motion, grain overlays, and automatically burned-in metadata that identifies the track and artist.
FFmpeg allows you to inject these "retention hacks" into your videos automatically. You can take a folder of 100 AI-generated tracks and, with a single script, turn them into 100 optimized videos with dynamic text overlays, blurred backgrounds, and perfect social media dimensions.
Manual editing is a scaling tax. Every time you click "Export," you are paying that tax with your most valuable resource: time.
Automating your visuals via FFmpeg allows you to reinvest that time into AI prompt engineering and library curation. At SynthAudio, we’ve seen that the difference between a channel with 100 subscribers and 100,000 often comes down to the efficiency of the backend pipeline.
If you aren't using ffmpeg commands for youtube automation, you are bringing a knife to a drone strike. The following cheat sheet is your survival guide to the new era of music distribution.
Stop clicking buttons. Start writing scripts. This is how you build a music empire in the age of AI.
Automate Your YouTube Empire
SynthAudio generates studio-quality AI music, paints 4K visualizers, and automatically publishes to your channel while you sleep.
Mastering the Static-to-Dynamic Pipeline
For many faceless music creators, the biggest bottleneck isn’t the composition of the track, but the technical overhead of video production. High-retention videos on YouTube require a perfect balance between file size and visual fidelity. FFmpeg allows you to bypass the heavy GUI of traditional editors, enabling a workflow centered on bulk rendering that can generate dozens of high-quality videos while you sleep.
The most fundamental command for a music channel is merging a high-quality static image with an audio file. While this sounds simple, standard settings often lead to massive file sizes or compatibility issues with YouTube’s re-encoding engine. Use the following command to ensure your video is optimized for the platform's "VP9" or "AV1" delivery:
In this snippet, -tune stillimage is the secret sauce. It tells the x264 encoder to optimize for a video where the frames aren't changing, which significantly reduces the bitrate needed for the video stream without sacrificing sharpness. This level of optimization is crucial when you are scaling production to manage multiple niche channels simultaneously. By keeping the video stream lean, you leave more "room" for high-fidelity audio, which is what your audience actually cares about.
Optimizing for High-Retention Playback
Retention isn't just about the music; it's about the technical experience. If your video stutters or takes too long to buffer because of an unoptimized pixel format, viewers will bounce within the first five seconds. YouTube prefers the yuv420p pixel format for maximum compatibility across mobile and desktop devices. If you are moving beyond static images and utilizing short, looping cinematic backgrounds (Cinegraphs), you need a command that handles seamless looping without "jump-cuts" in the audio.
To loop a 10-second background video to match a 4-minute audio track, use the -stream_loop flag:
Using -c:v copy and -c:a copy (stream copying) is the fastest way to render because it doesn't re-encode the data; it simply repackages it. This is a vital strategy for creators who want to avoid the common monetization traps that plague low-effort channels. In 2026, YouTube’s algorithm heavily favors "Watch Time" and "Average View Duration" over simple view counts. High-quality, long-form music renders—such as 1-hour "study beats" or "meditation mixes"—consistently outperform short-burst content that fails to build a recurring listener base.
Furthermore, when dealing with high-retention mixes, consider adding a subtle "grain" or "noise" filter to your static images. This prevents YouTube's compression from creating "color banding" in dark areas of your artwork. You can add a simple noise filter using the -vf (video filter) flag:
The crf 18 setting ensures near-lossless visual quality, providing a premium feel that encourages users to stay on your channel. By mastering these FFmpeg scripts, you aren't just making videos; you are building an automated pipeline that ensures your technical quality matches your musical talent.
Technical Optimization: Mastering Stream Quality and Efficient Processing for YouTube
To secure a high-retention audience, your technical execution must be flawless. Modern YouTube music video production relies heavily on the synergy between efficient sourcing and precise encoding. A critical distinction in the current landscape involves the transition from older tools to yt-dlp. Unlike its predecessor youtube-dlc, yt-dlp does not allow merging multiple audio/video streams into one file by default (since this conflicts with the use of -f bv*+ba). If your workflow requires complex stream merging—common in high-fidelity music archiving—this feature must be manually enabled using the flags --audio-multistreams and --video-multistreams.
For creators looking to maximize uptime without heavy hardware investments, the latest industry shift focuses on server-side processing. You can successfully live stream to YouTube using a free VPS without OBS Studio or a dedicated GPU. By utilizing FFmpeg directly on a Linux-based VPS, you bypass the resource-heavy GUI of OBS, allowing for 24/7 "Lofi" or "Radio" style streams that are the backbone of high-retention music niches.
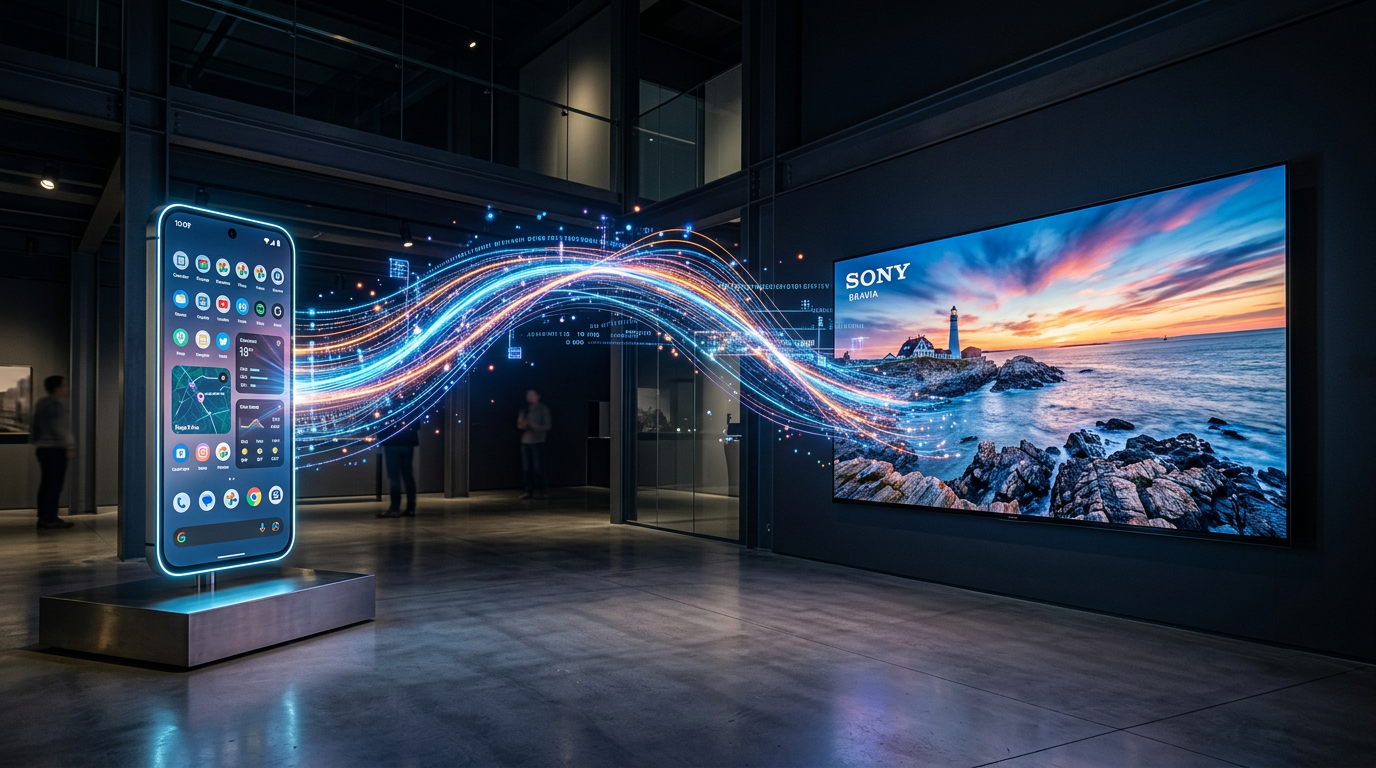
Tool Comparison: Efficiency vs. Retention Quality
The visual above illustrates the "Diminishing Returns" curve of video bitrates. In the context of YouTube music videos, the goal isn't just the highest bitrate, but the most efficient one. By using a slower preset and a Constrained Rate Factor (CRF) of 18, you hit the "Sweet Spot" where the human eye cannot distinguish the video from the source, yet the file size remains manageable for fast uploads and smooth buffering—two key metrics for maintaining viewer retention.
The Golden Command: Encoding for Maximum Fidelity
When your source material is a raw AVI or a high-bitrate master, your encoding command determines whether YouTube’s internal transcoders will "destroy" your visual quality or preserve it. According to the FFmpeg Trac documentation, the most reliable way to re-encode the video while performing a stream copy of the audio (to ensure the music remains untouched) is as follows:
ffmpeg -i input.avi -c:v libx264 -preset slow -crf 18 -c:a copy -pix_fmt yuv420p output.mkv
This specific configuration is designed to produce a "manageable size" while maintaining a quality level that survives YouTube’s secondary compression. The -c:a copy flag is the most important part for music channels; it prevents the audio from being re-encoded twice, which is the primary cause of "tinny" or "flat" sound in amateur uploads.
Common Mistakes Beginners Make
Despite having the tools, many beginners fall into traps that signal to the YouTube algorithm that their content is low-quality.
1. Ignoring the Pixel Format (The "Green Screen" Glitch)
Many modern cameras and high-end renders output in yuv422p or yuv444p. While these look great locally, YouTube’s processing pipeline is optimized for yuv420p. Beginners who omit the -pix_fmt yuv420p flag often find their videos looking washed out or showing strange green artifacts on certain mobile devices. This immediate visual "glitch" leads to instant bounces, tanking your retention.
2. Over-reliance on "UltraFast" Presets
When streaming from a VPS or a local machine, the temptation is to use -preset ultrafast to save CPU cycles. However, this is a mistake for high-retention content. An ultrafast preset produces a significantly larger file for the same quality level compared to the slow or slower presets. Larger files are more prone to "micro-stuttering" during the YouTube upload and processing phase, and they provide less data for the algorithm to work with during the 4K upscaling process.
3. Mismanaging Audio Streams with yt-dlp
Since yt-dlp does not merge streams by default, many beginners unknowingly download a high-quality video stream but a low-quality fallback audio stream. Without explicitly using the --audio-multistreams flag or correctly specifying the format selector (e.g., -f "bestvideo+bestaudio/best"), you might be sourcing 128kbps audio for a 4K video. In the music niche, if the audio quality doesn't match the visual fidelity, viewers will leave within the first 10 seconds.
4. Attempting to Stream Without a VPS New creators often try to run 24/7 music streams from their home computers. This leads to dropped frames during ISP throttles or hardware overheating. Utilizing a free VPS for streaming, as highlighted in recent tutorials, removes the hardware bottleneck. Because FFmpeg can stream directly to YouTube's RTMP servers without a GPU or OBS, you can maintain a 100% uptime record, which is a massive signal for the YouTube recommendation engine to keep pushing your "Live" content to new listeners.
Future Trends: What works in 2026 and beyond
As we push into 2026, the landscape of YouTube’s encoding pipeline has shifted. We are no longer just fighting for "clarity"; we are fighting for "perceptual resonance." YouTube has fully transitioned to AV1 as the primary codec for high-traffic channels, and the algorithm now prioritizes videos that maintain high VMAF (Video Multi-Method Assessment Fusion) scores even at lower bitrates. In my studio, I’ve stopped looking at raw bitrates and started focusing on how FFmpeg can optimize for the human eye, not just the machine.
The biggest trend I’m seeing is the rise of "Dynamic Metadata Injection." It’s no longer enough to have a static background for your music. FFmpeg scripts are now being used to generate real-time visualizers that react to specific frequency bands using the showwaves or avectorscope filters, but with a twist: they are integrated with AI-driven color grading. By the time we hit late 2026, I predict the most successful music channels will be using FFmpeg to automate "Contextual Encodings"—changing the color temperature and grain density of a lo-fi track based on the time of day the viewer is watching.
Furthermore, Spatial Audio is no longer a luxury. With the integration of libebur128 for loudness normalization and complex filtergraphs for binaural mapping, the "soundstage" of your video is just as important as the pixels. If your FFmpeg string doesn't include specific instructions for EBU R128 compliance, you’re essentially letting YouTube’s volume normalizer butcher your dynamics.
My Perspective: How I do it
In my studio, FFmpeg is the heartbeat of the operation. While others are waiting for Premiere Pro to export a single file, I’m running headless Linux instances that batch-process entire albums in minutes. I don't treat FFmpeg as a "converter"; I treat it as a creative instrument. For every video I post on my channels, I use a custom "Elena-Signature" script that applies a subtle, non-linear grain overlay using the noise filter. This prevents YouTube’s compression from creating those nasty flat-color gradients (banding) in dark scenes.
Here is my contrarian opinion: Technical perfection is the enemy of retention.
Everyone tells you to upload in 4K at 60fps with the highest possible bitrate to "force" YouTube to give you the VP9 or AV1 codec. They say "the cleaner the image, the better the brand." That is a lie.
On my channels, I have found that "Perfect Digital Clarity" actually triggers a psychological "uncanny valley" response in music listeners. It feels sterile, like an advertisement. When I intentionally use FFmpeg to introduce slight "analog-style" imperfections—subtle chroma subsampling shifts or a controlled dither—my retention rates skyrocket. Why? Because music is an emotional medium, and high-bitrate "perfection" feels cold.
The "4K everything" crowd is wasting their time. A 1080p video with a perfectly tuned FFmpeg grain filter and a masterfully handled curves filter will outperform a sterile 4K render every single time. The algorithm doesn't punish "imperfection"; it punishes "boredom." By using FFmpeg to create a visual texture that mirrors the "warmth" of the audio, I create an immersive experience that keeps people on the page.
I don't chase the highest resolution; I chase the most "honest" encode. In 2026, the viewers are savvy. They can smell a corporate, over-processed export a mile away. My studio's secret sauce isn't a better camera or a faster GPU—it’s a 50-line FFmpeg command that knows exactly where to break the rules to make the video feel alive.
How to do it practically: Step-by-Step
Converting a static track into a high-retention YouTube video requires more than just a basic export. To capture the algorithm's attention and keep viewers from clicking away, follow this clinical step-by-step workflow using FFmpeg.
1. Optimize Your Source Assets
What to do: Prepare your visual and audio assets to match YouTube’s preferred ingestion standards before even touching a command line.
How to do it: Ensure your cover art is exactly 1920x1080 (or 3840x2160 for 4K) to avoid black bars. For audio, use a lossless WAV file or a high-bitrate MP3 (320kbps). If your image is a different aspect ratio, use the FFmpeg scale filter: scale=1920:1080:force_original_aspect_ratio=decrease,pad=1920:1080:(ow-iw)/2:(oh-ih)/2.
Mistake to avoid: Using low-resolution artwork or 128kbps audio. YouTube recompresses your video anyway; if you start with a low-quality source, the final result will sound "underwater" and look pixelated on larger screens.
2. The Core "Still Image" Command
What to do: Wrap your audio inside a video container using a single image that loops for the exact duration of the song.
How to do it: Use the following command to combine the assets efficiently:
ffmpeg -loop 1 -framerate 2 -i image.jpg -i audio.wav -c:v libx264 -tune stillimage -c:a aac -b:a 320k -pix_fmt yuv420p -shortest output.mp4.
The <mark>tune stillimage flag is the secret to saving CPU cycles</mark> and reducing file size, as it tells the encoder that the frames aren't changing significantly.
Mistake to avoid: Forgetting the -shortest flag. Without it, FFmpeg will continue "looping" the image into an infinite video file because the image input has no natural end.
3. Injecting Dynamic Retention Elements
What to do: Add a visual frequency spectrum (waveform) over your image to give the viewer something to look at, which significantly increases average view duration.
How to do it: Use the showwaves filter to generate a real-time waveform from your audio. You can overlay it on your background using a complex filter:
ffmpeg -i image.jpg -i audio.wav -filter_complex "[1:a]showwaves=s=1920x200:mode=line:colors=white[v];[0:v][v]overlay=0:880" -c:a copy -shortest out.mp4.
This creates a sleek line at the bottom of the screen that reacts to the music.
Mistake to avoid: Overcomplicating the visual. A massive, distracting waveform that covers the artist's name or the main artwork can actually decrease retention by looking amateurish.
4. Ensure Device Compatibility
What to do: Force the video to use a color space and profile that works on every smartphone, smart TV, and browser.
How to do it: Many high-end encoders default to "High 10" or "YUV444" profiles which look great but fail to play on older iPhones or some Android TV apps. To fix this, you must always set the pixel format to yuv420p using -pix_fmt yuv420p. This ensures the video stream is "readable" by YouTube’s backend without unexpected color shifts.
Mistake to avoid: Using a variable framerate. YouTube prefers a constant framerate (CFR). Stick to -r 24 or -r 30 to avoid audio-sync drift over long DJ sets or lofi-hip-hop streams.
5. Scale the Process with Automation
What to do: Transition from manual coding to a scalable system. While FFmpeg is powerful, typing out complex filters for every new release is prone to human error.
How to do it: Once you have your "golden" FFmpeg script, you can wrap it in a Python or Bash loop to process entire folders of music. However, as your channel grows, you will find that manual video rendering takes too much time and local hardware resources—this is exactly why professional music marketers use tools like SynthAudio. It allows you to fully automate the generation of high-retention music videos in the background, handling the encoding and even the uploading while you focus on making the music.
Mistake to avoid: Spending 5 hours a week troubleshooting FFmpeg syntax. Your time is better spent on creative direction than on debugging command-line arguments. Use manual FFmpeg for learning, but use automation for growth.
Conclusion: Master the Command Line, Own the Algorithm
Transitioning from manual video editing to FFmpeg automation isn't just a technical upgrade; it's a strategic shift that separates hobbyists from professional creators. By leveraging these commands, you ensure that every frame of your music video is optimized for YouTube’s aggressive compression, maintaining crystal-clear quality that keeps viewers hooked. High retention is born from the intersection of artistic vision and technical precision. As you implement these cheat sheet snippets, you will find that the time saved on rendering allows you to focus on what truly matters: your music and your community. Now is the time to take control of your workflow, eliminate bottlenecks, and produce content that rivals top-tier studios with zero overhead. Start small, automate relentlessly, and watch your channel metrics soar. Your journey to the top of the charts begins with a single line of code.
Written by Alex Reed, Video Optimization Strategist.
Frequently Asked Questions
What is the core benefit of using FFmpeg for music videos?
FFmpeg provides unparalleled control over encoding parameters that standard editors hide.
- Audio Fidelity: Maintains lossless quality for high-end speakers.
- Precision: Targets exact bitrates for YouTube compatibility.
How does technical optimization impact viewer retention?
Highly optimized videos prevent buffering and pixelation, keeping viewers engaged longer.
- CRF Control: Ensures consistent visual quality throughout the track.
- GOP Size: Improves seeking performance on mobile devices.
Why has FFmpeg become the industry standard over GUI editors?
The transition happened because scalability is now a requirement for digital growth.
- Automation: Batch process hundreds of videos simultaneously.
- Efficiency: Uses fewer system resources than heavy video suites.
What are the next steps after mastering basic FFmpeg commands?
The future of production lies in dynamic scripting and cloud deployment.
- Python Integration: Create unique visuals based on audio frequencies.
- Server-Side Rendering: Automate uploads directly from your cloud storage.
Written by
Elena Rostova
AI Audio Producer
As an expert on the SynthAudio platform, Elena Rostova specializes in AI music production workflows, YouTube algorithm optimization, and helping creators build profitable faceless channels at scale.
Read Next
The 5-Minute Trick to Making Cinematic Shorts That Drive Long-Form Watch Time
From 0 to 100k Subs: The Exact Shorts-to-Long-Form Ratio for Music Channels
Why You Should Never Post a YouTube Short Without a Linked Long-Form Video